What's in this guide
Before you begin
Filling out the whole form usually takes 20–45 minutes. Having these ready before you start will make it faster:
- Your PO number and requested go-live date
- Your library's name, mailing address, and main phone number
- Whether you use Polaris or Sierra, and which services (SMS, Outbound Voice, Telrenew)
- Your Polaris API credentials, if you have them — if not, that's okay, see Step 3
- A support email and phone number patrons can use to reach your library
- A list of your branch names and abbreviations
- If you're porting a phone number: the number itself, the requested port date, a signed Letter of Authorization (LOA), and the first page of your most recent phone bill
Getting started
When you open the portal, you'll see three areas on screen: a sidebar on the left (your progress, session token, and an upload option), the current step's questions in the middle, and Back / Next buttons at the bottom. The header at the top and the Back/Next bar at the bottom both stay in view as you scroll, so on longer pages you don't need to scroll all the way down to move to the next section. A page counter in the top-right corner ("Page 1 of 7") shows how far along you are — the exact number of pages depends on which services you select.
1Welcome page
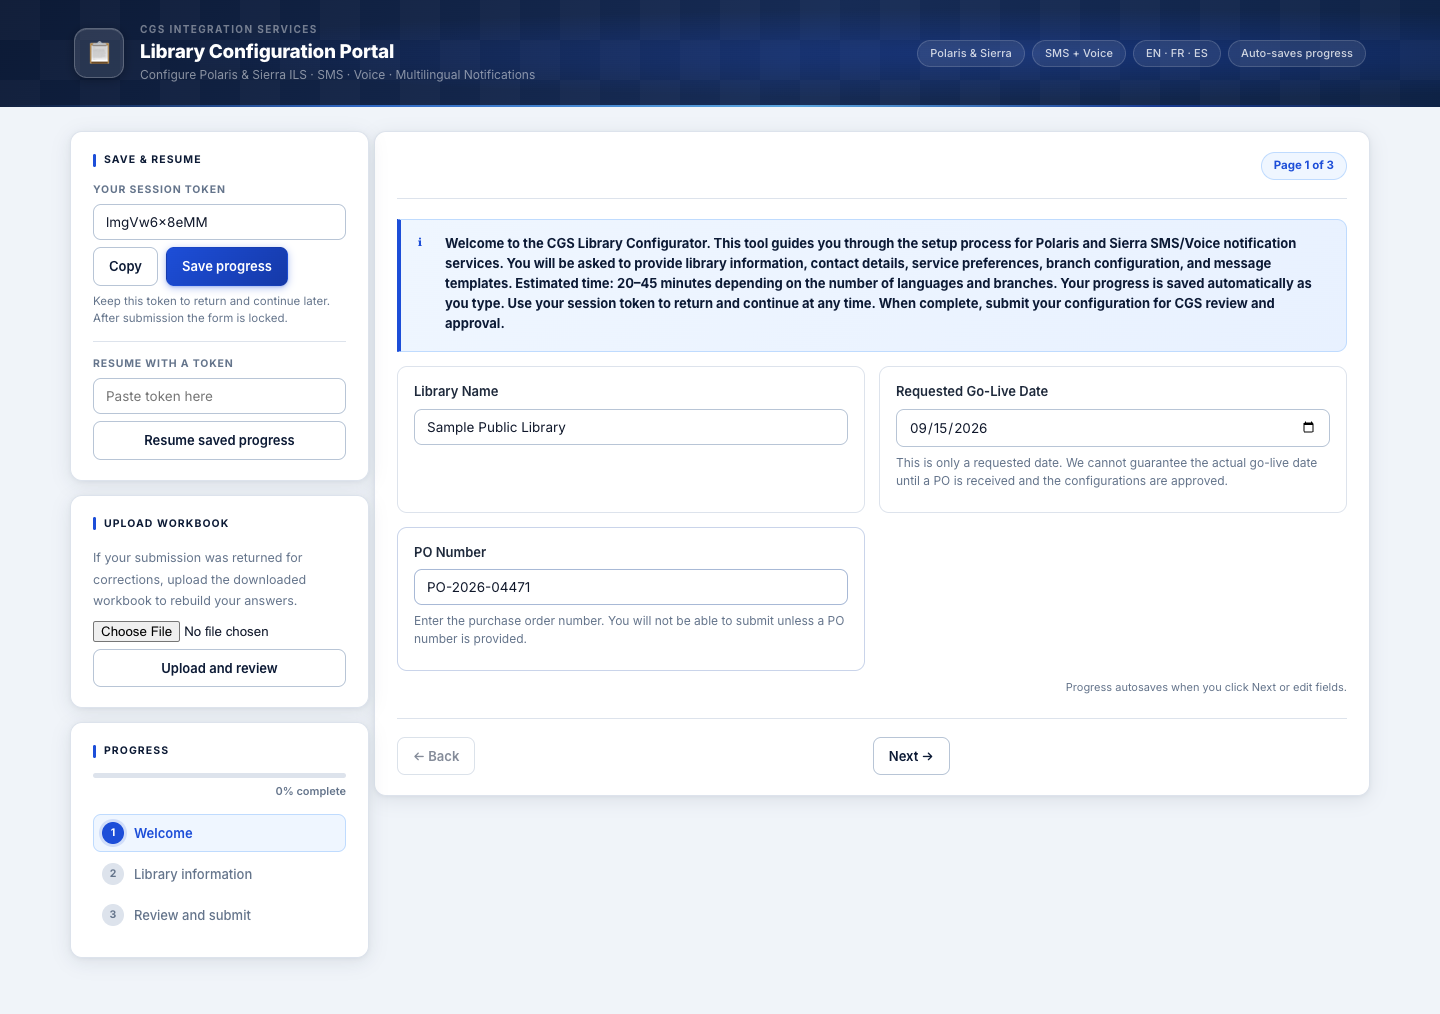
Start by entering three basic details about your library and this request.
- Enter your Library Name.
- Choose your Requested Go-Live Date. This is a target, not a guarantee — the real date depends on your PO and configuration approval.
- Enter your PO Number. You cannot submit the form without one.
- Click Next → to continue.
2Library information
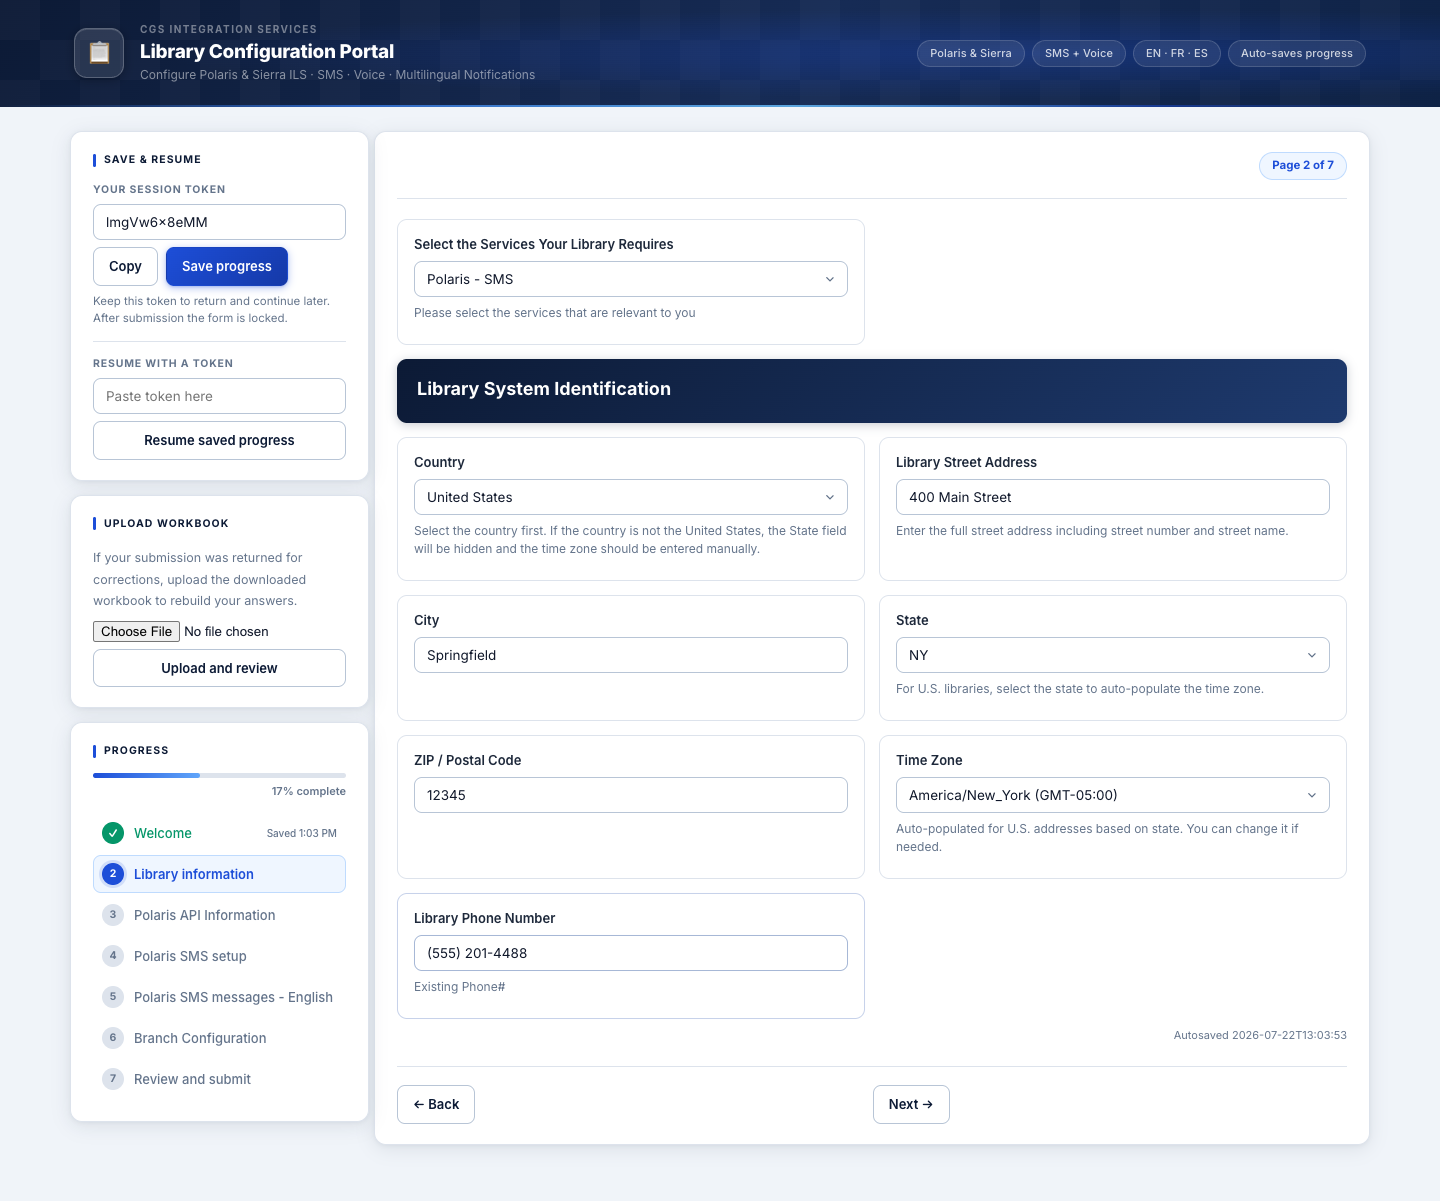
This page decides what the rest of the form looks like, so take a moment on the service dropdown.
- Under Select the Services Your Library Requires, choose the option that matches what you're setting up (for example, "Polaris - SMS" or "Sierra - SMS"). The remaining pages of the form will automatically adjust to match your choice.
- Fill in your library's Street Address, City, State, and ZIP Code. Your Time Zone fills in automatically once you pick a state.
- Enter your library's main Phone Number.
- Click Next →.
3Polaris API information
Only shown for Polaris-based services. This connects the portal directly to your library's Polaris system.
- Fill in the Production API URL, API Username, API Key, Local Domain, Staff Username, and Staff Password fields with your Polaris API credentials.
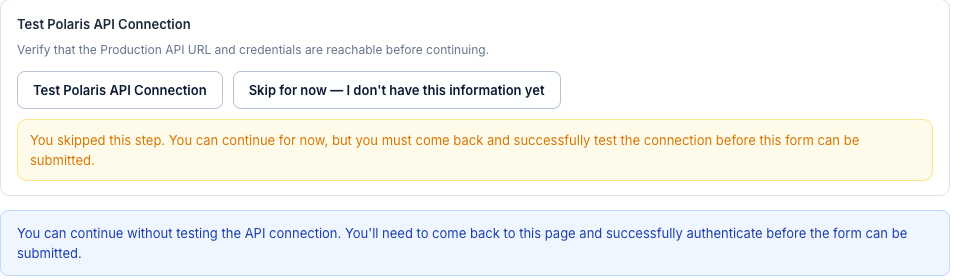
- Click Test Polaris API Connection to verify everything is correct.
- If the test passes, click Next → to continue.
4Service setup & messages
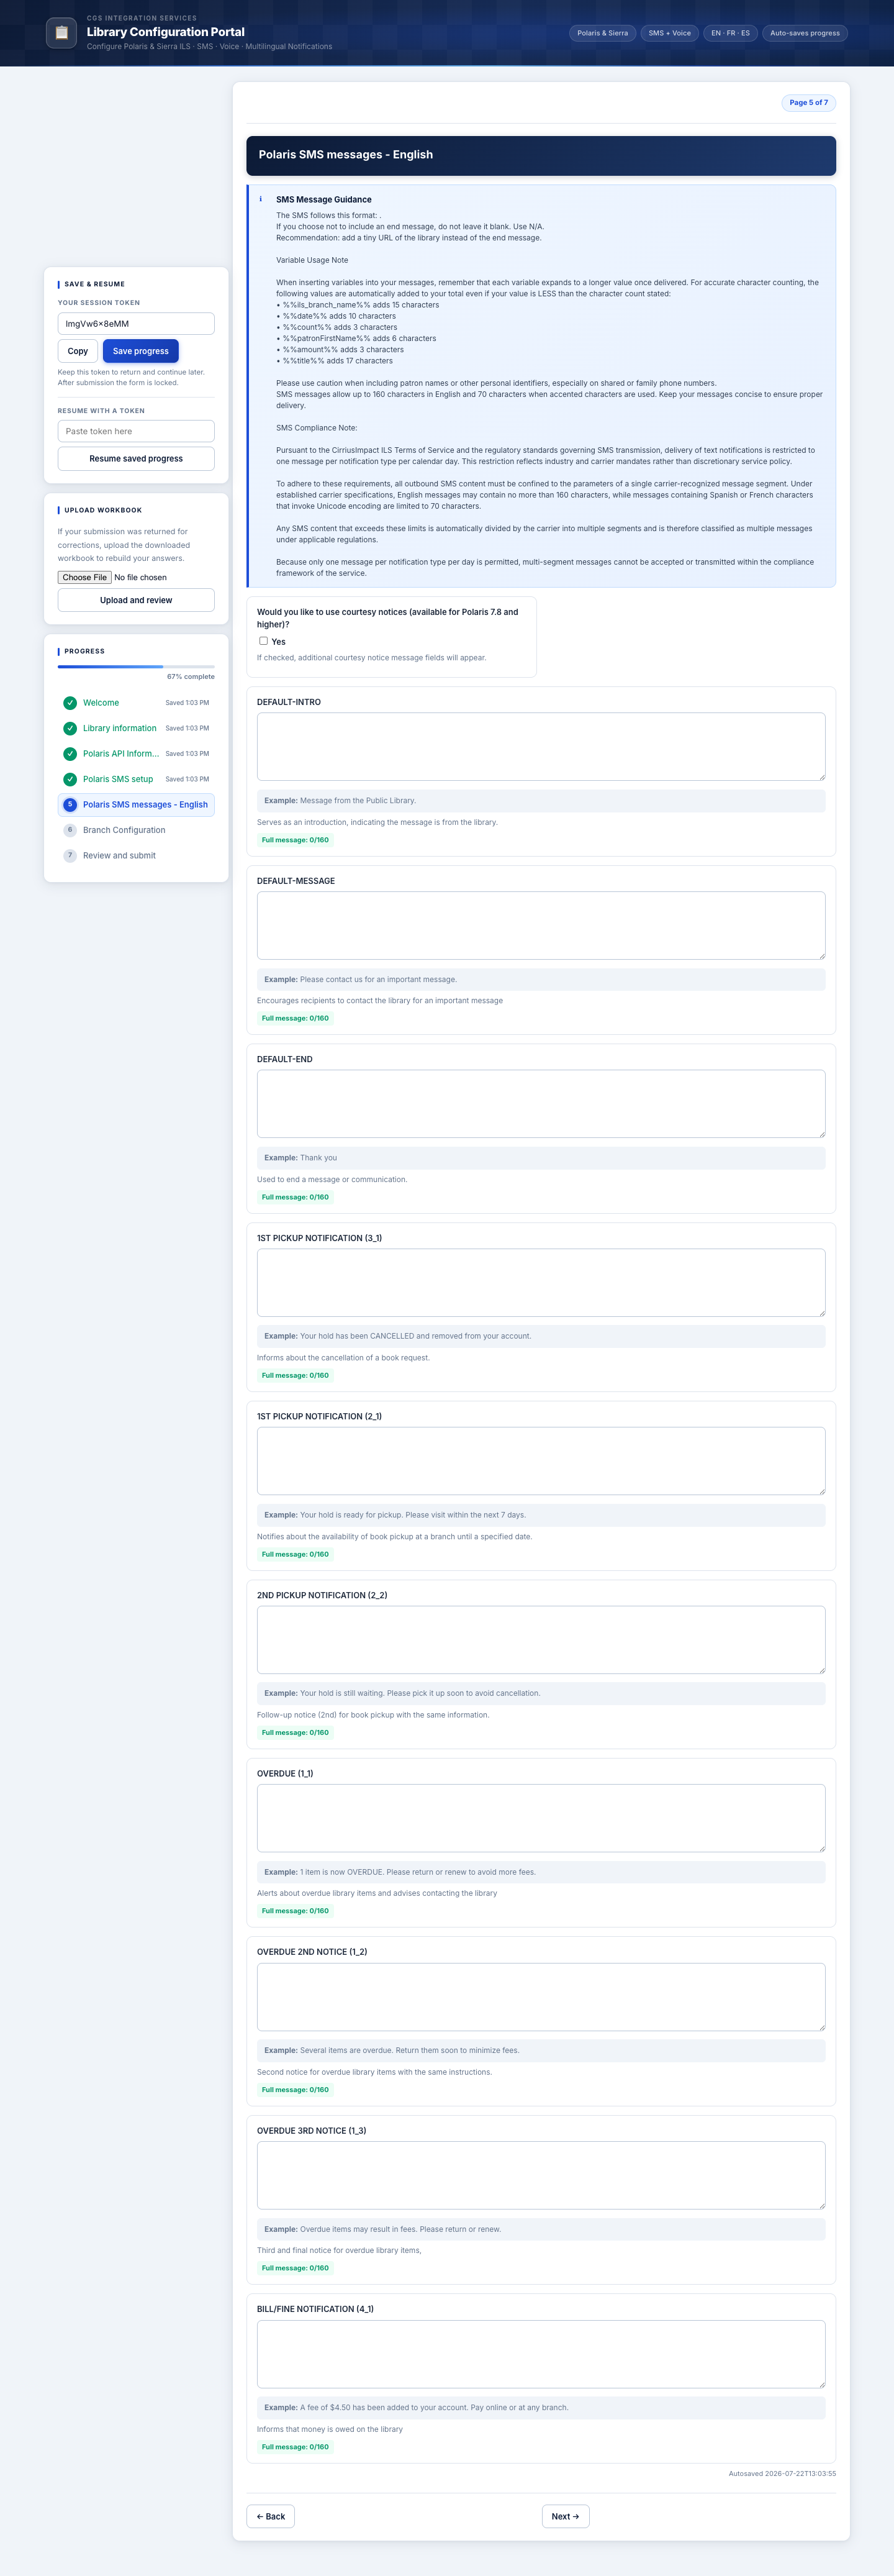
These pages configure the notification service(s) you selected — SMS, Voice, or Sierra equivalents. Exactly which pages you see depends on your Step 2 selection.
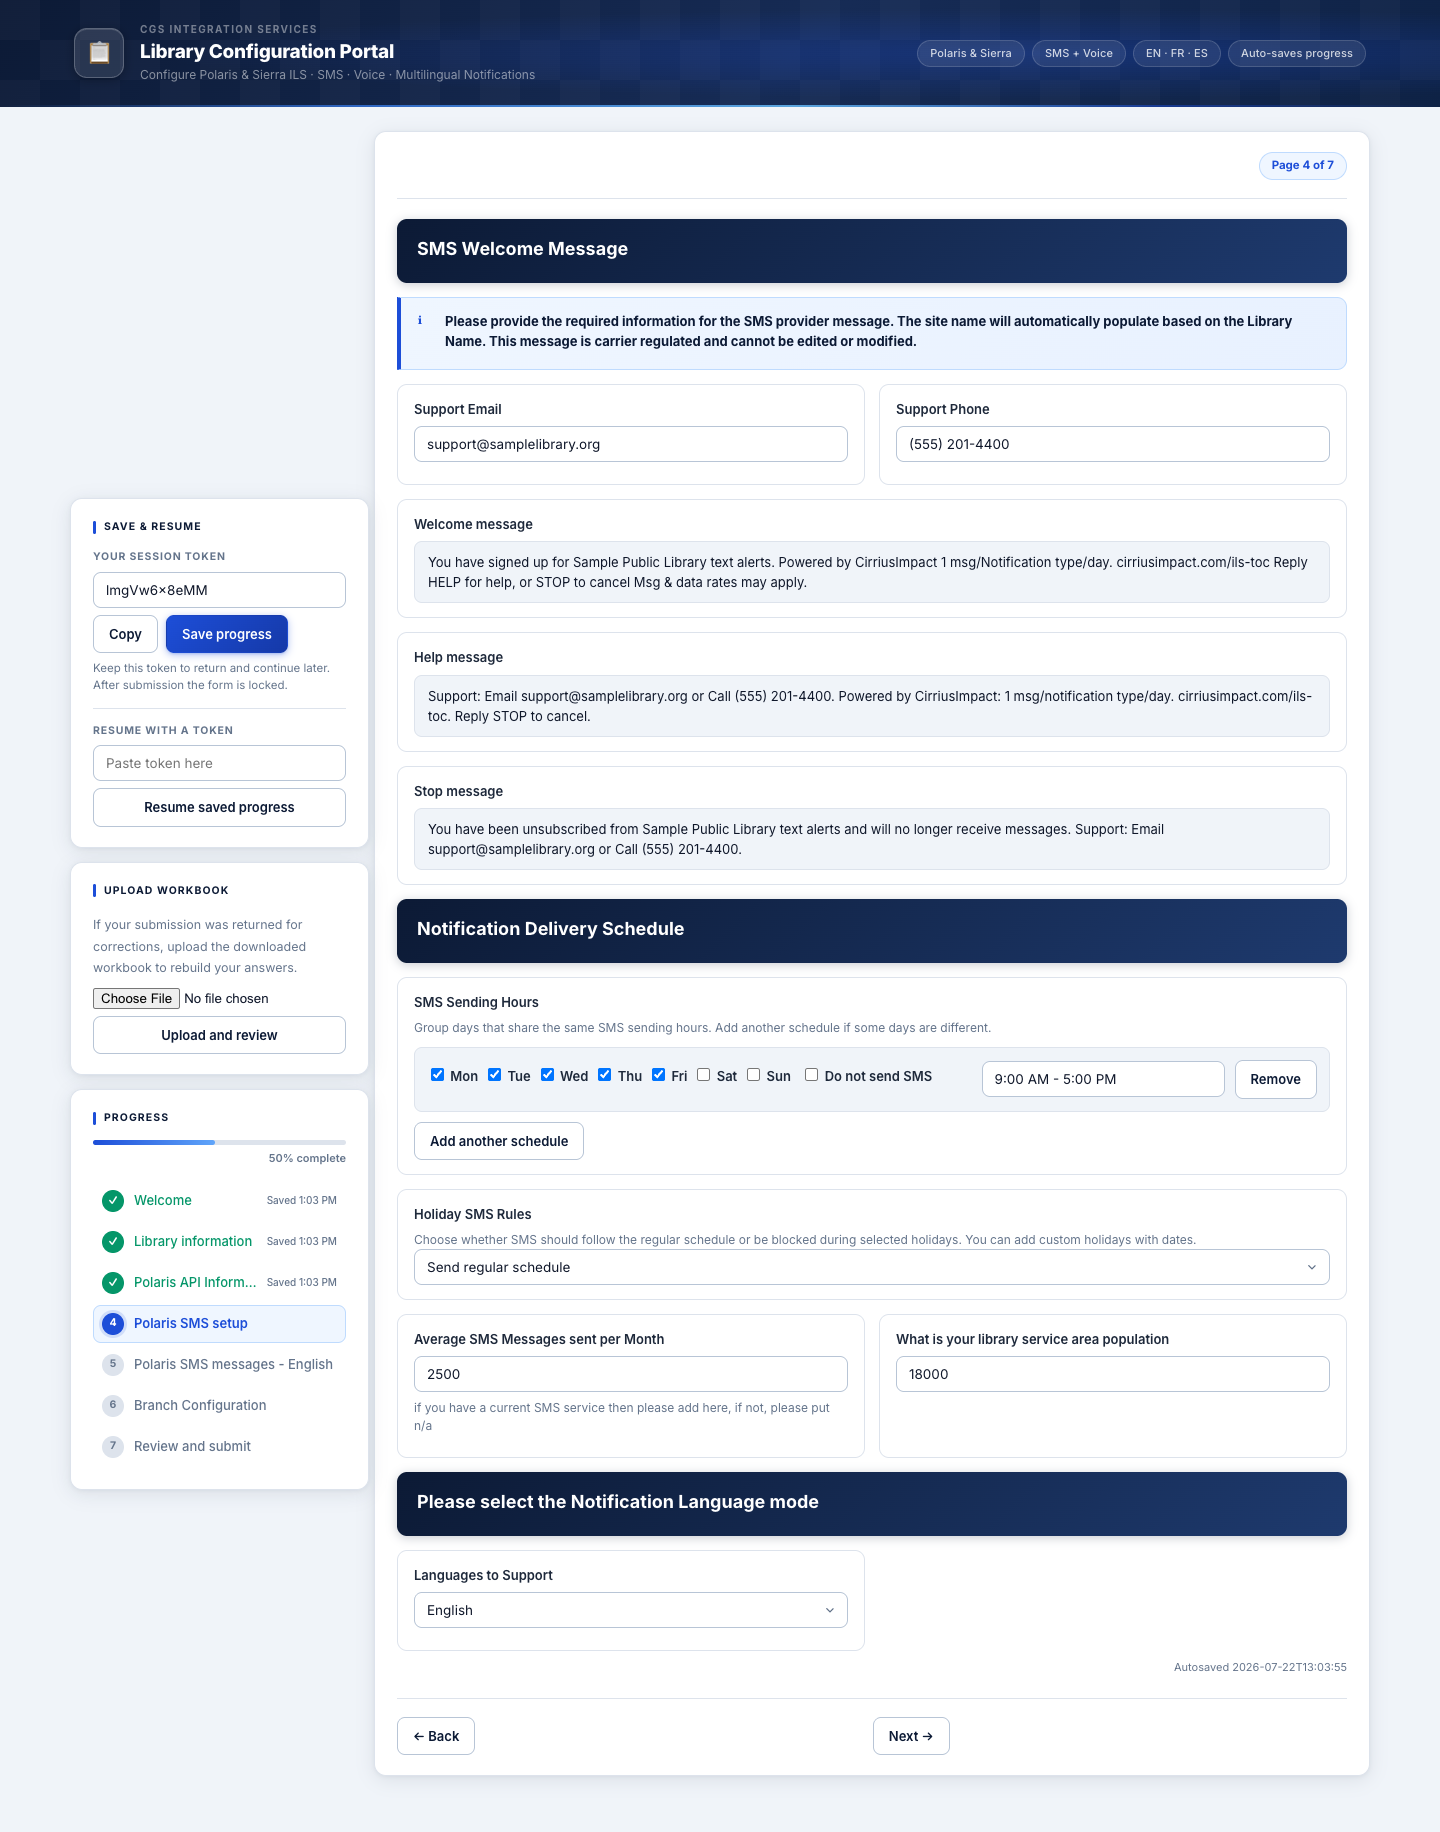
- Enter a Support Email and Support Phone patrons can use if they have questions about a text or call.
- Fill in your average monthly message volume and service area population — these help CGS provision the right capacity.
- Set your Sending Hours (which days and times notifications should go out) and your Holiday Rules (whether to pause notifications on selected holidays).
- Choose the language(s) you want to support.
- Click Next → to move into the message pages, where you'll customize the actual text/voice wording sent to patrons for each notification type (pickup, overdue, fines, etc.) in each language you selected.
5Porting a phone number
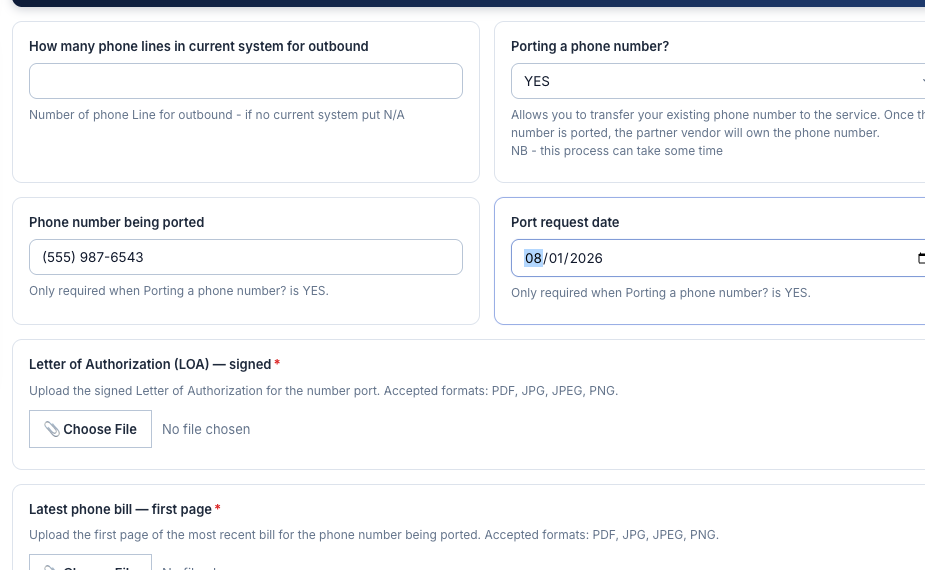
Only appears on the Outbound Voice setup page, and only if you answer Porting a phone number? with YES.
Porting means transferring your existing phone number to the new service, instead of being assigned a new one. This process takes time, so four extra fields appear once you select YES:
- Phone number being ported — the existing number you want to keep
- Port request date — when you'd like the transfer to happen
- Letter of Authorization (LOA) — signed — a required upload authorizing the transfer
- Latest phone bill — first page — a required upload, used to verify the account details on file
6Branch configuration
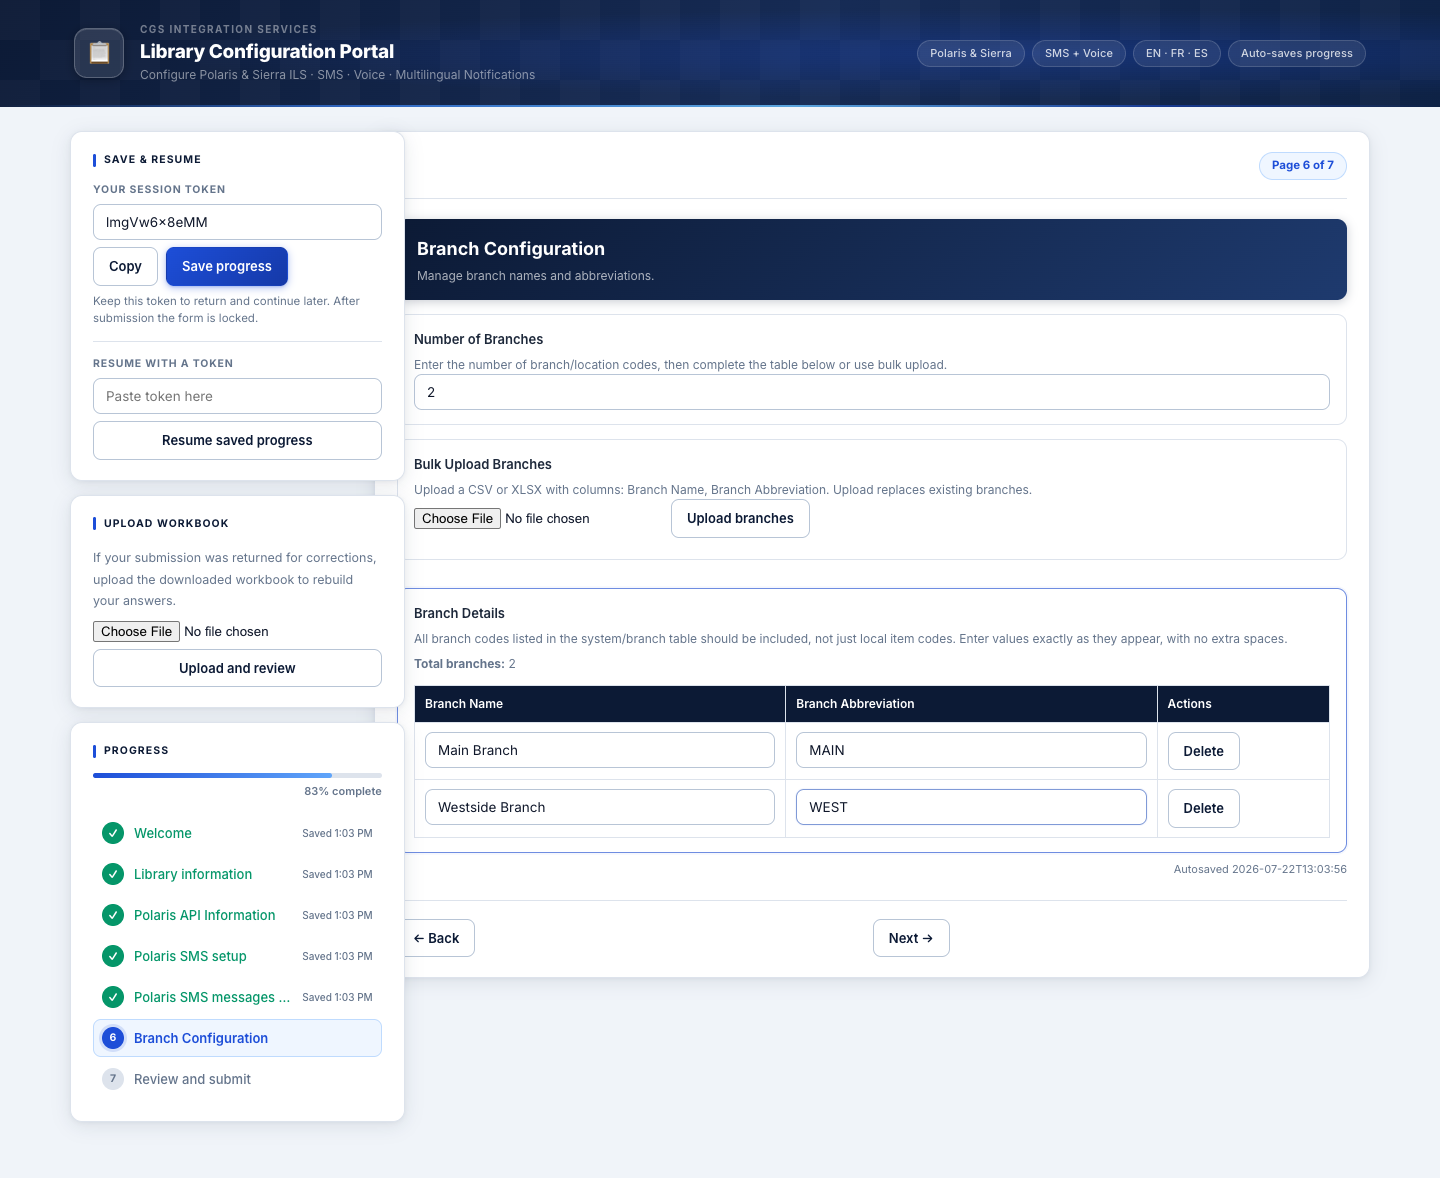
Every branch/location code that should receive notifications needs to be listed here.
- Enter your Number of Branches.
- A table appears with one row per branch — fill in the Branch Name and Branch Abbreviation for each, exactly as they appear in your system (no extra spaces).
- Have a lot of branches? Use Bulk Upload Branches instead — upload a CSV or XLSX file with two columns (Branch Name, Branch Abbreviation) and it will fill in the table for you.
- Click Next →.
7Review & submit
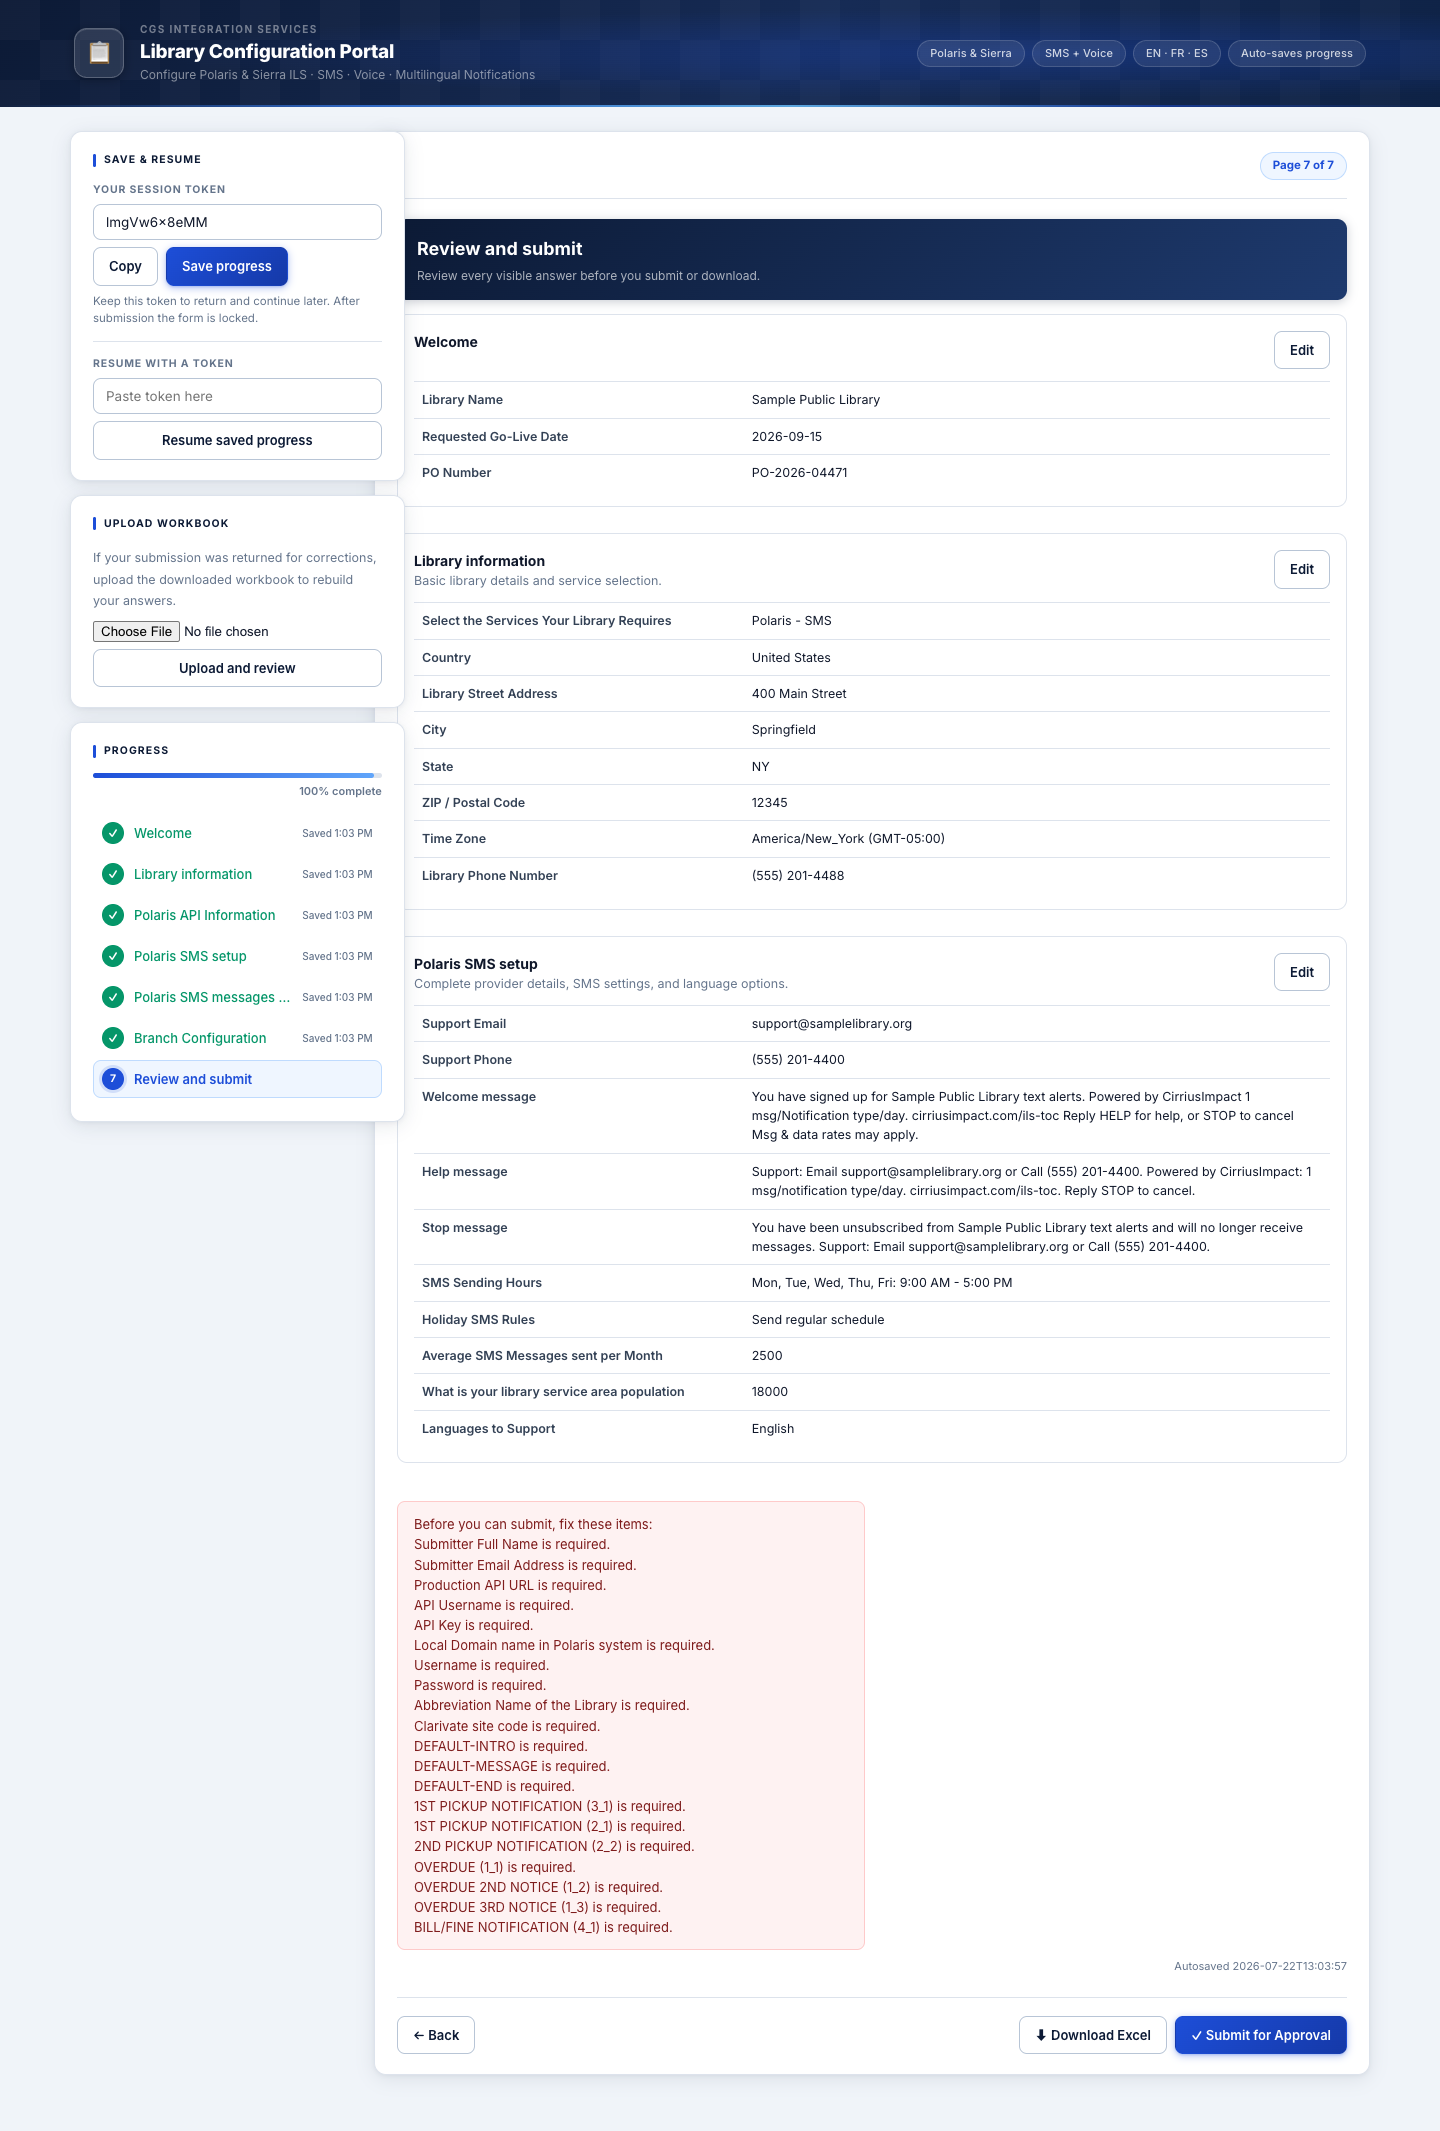
The last page shows everything you've entered, grouped by section, with an Edit button on each card that jumps you straight back to that page.
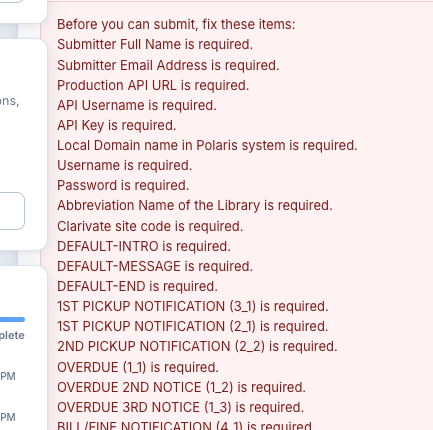
If something's still missing
A red checklist lists anything required that's still blank or incomplete. Use the Edit button on the relevant section to fix it, then return to Review.
Getting a copy for yourself
Click Download Excel Copy at any time to save a spreadsheet copy of your answers to your computer — useful for your own records, or to share internally before submitting.

Submitting for approval
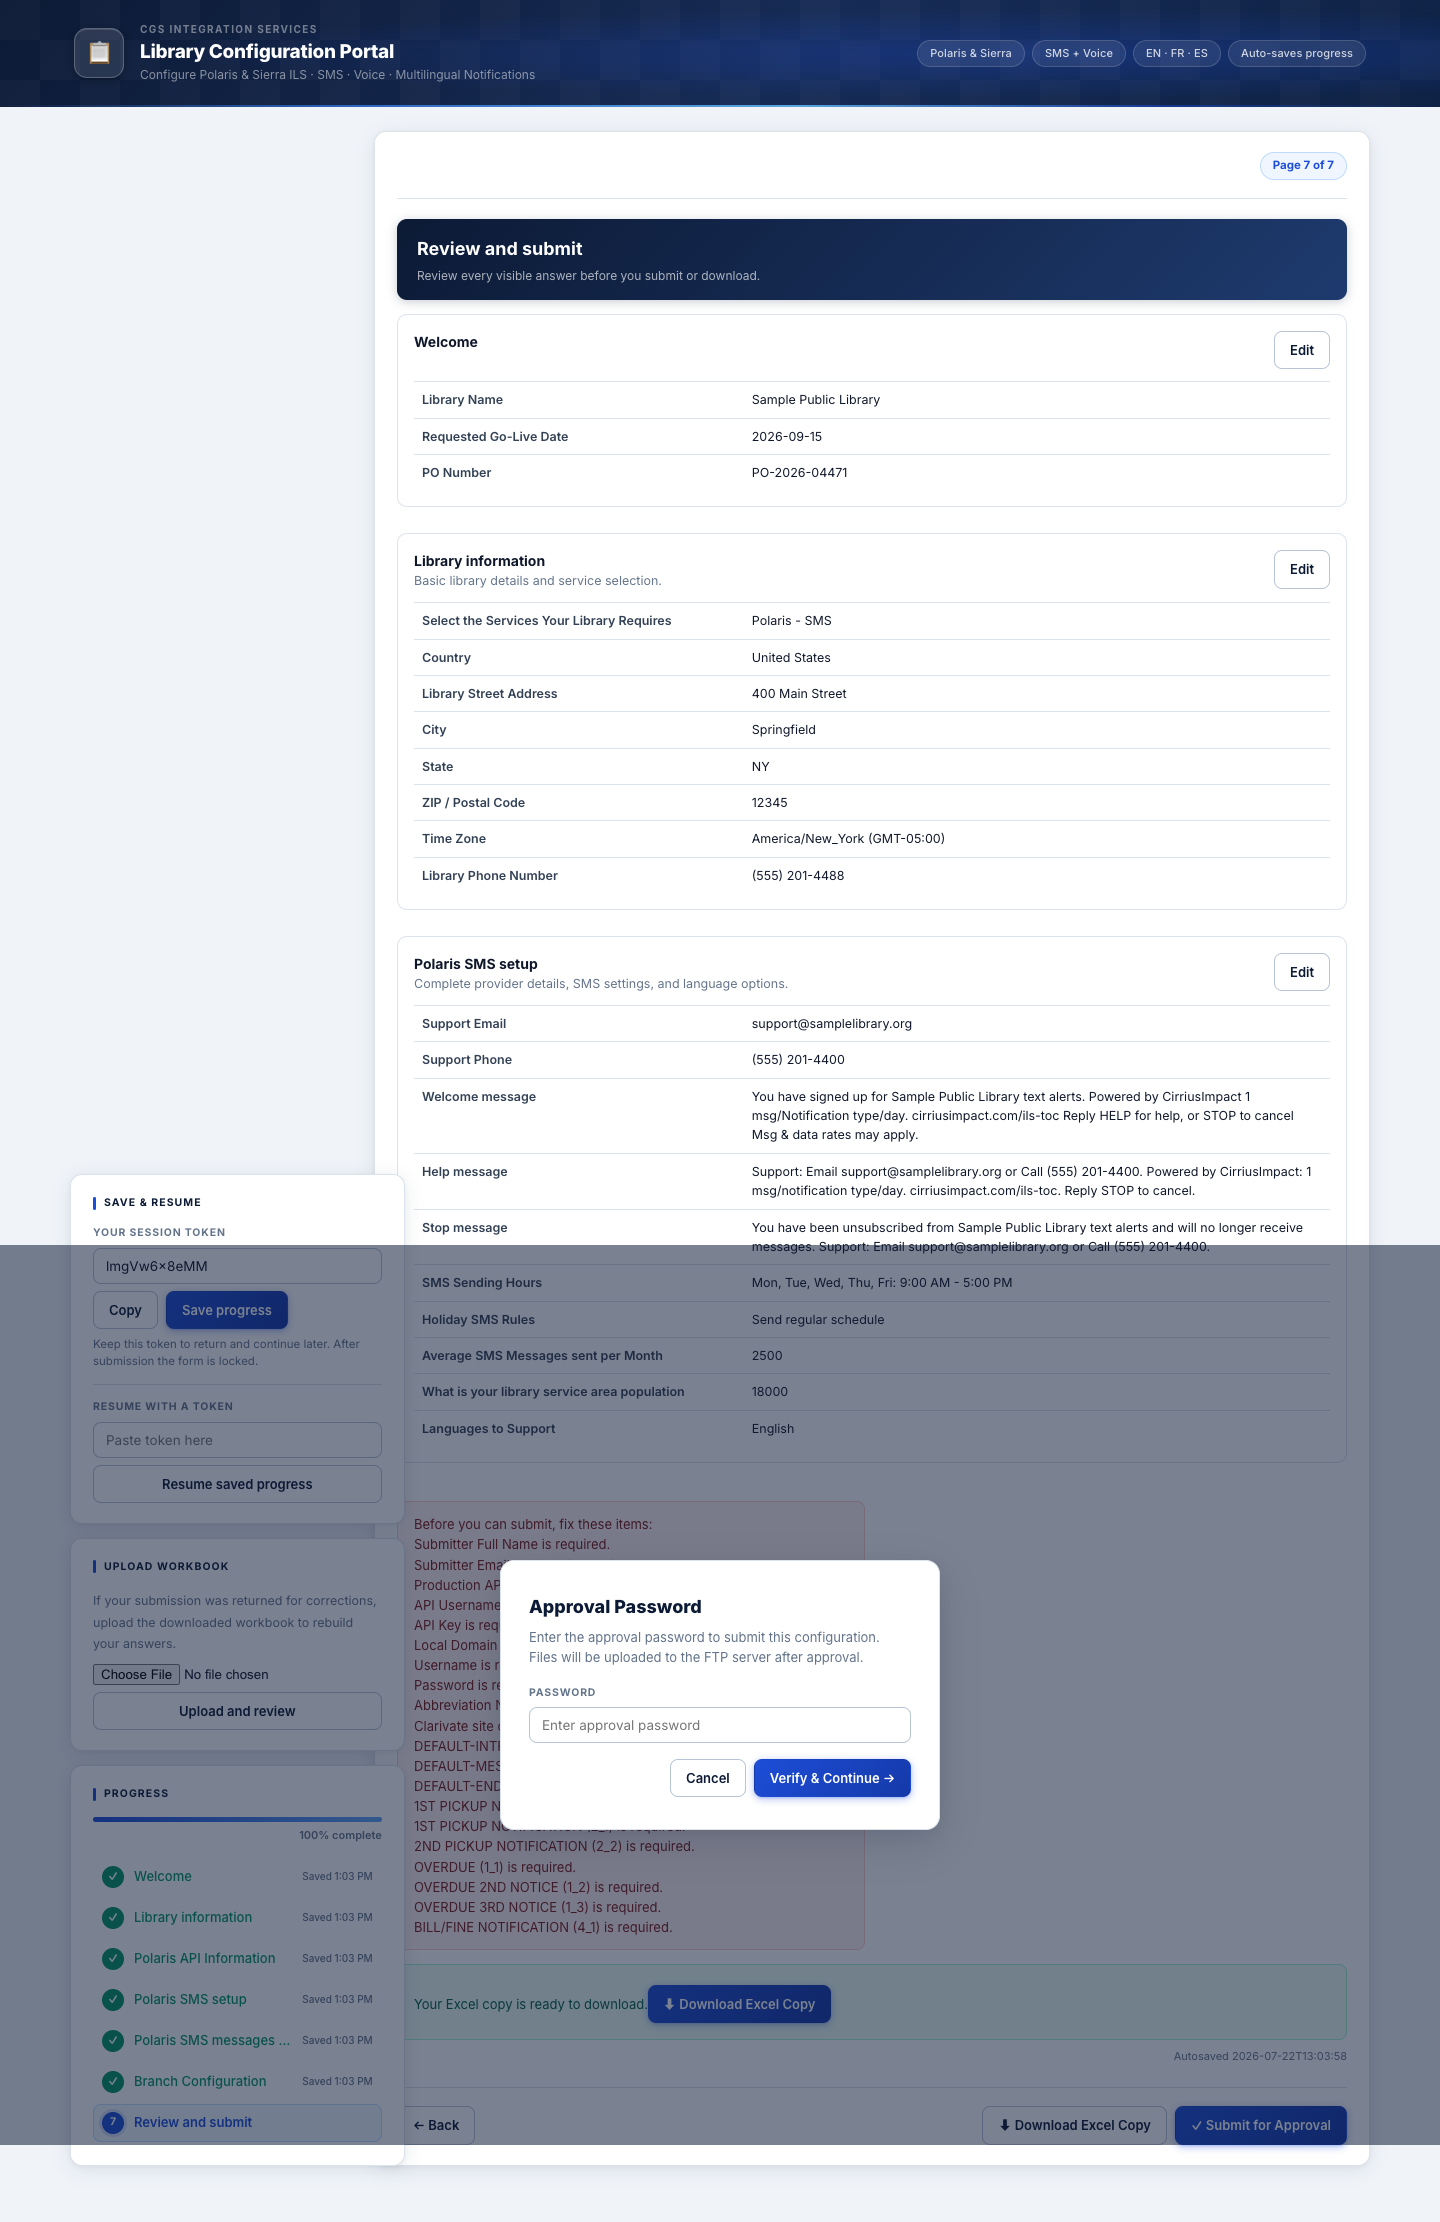
- Once everything is complete, click ✓ Submit for Approval.
- A window will ask for an approval password (provided to you by your CGS contact), followed by your name and email address.
- After you confirm, submission can take up to a minute — a banner will remind you not to click the back button or close the page while it finishes.
- Once it's done, you'll see a confirmation with a support ticket number and a confirmation email.
Saving your progress
You don't have to finish everything in one sitting.
- Your answers autosave every time you click Next or edit a field.
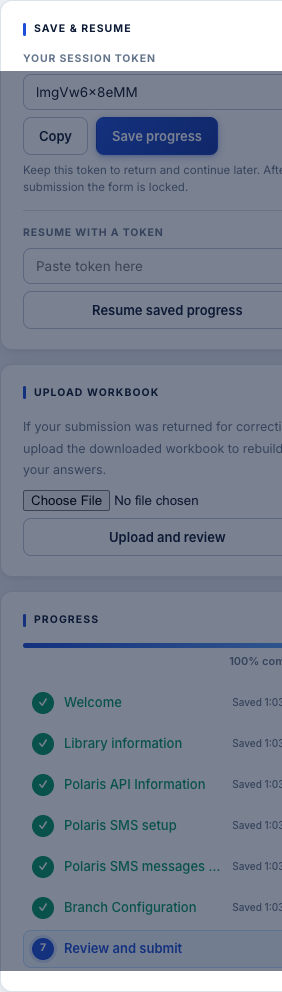
- Your unique session token appears in the Save & Resume card in the sidebar — copy it and keep it somewhere safe. It's the only way to return to your in-progress form.
- Click Save progress any time to save explicitly and confirm the token is up to date.
- To come back later, expand Resume with a token in that same card, paste your token in, and click Resume saved progress.
If your submission is returned for corrections
If CGS needs a change, you'll receive the workbook back and can reload it into the portal instead of starting over.
- In the sidebar, expand the Upload workbook card, click Choose File, and select the returned
.xlsxfile. - Click Upload and review. All of your original answers load back into the form.
- Make the requested changes and submit again.
Tips & troubleshooting
- Lost your token? Unfortunately it can't be recovered — you'll need to start a new submission. This is why saving it somewhere safe matters.
- Stuck on a required field you can't fill in yet? Most pages let you continue with Next and come back later — the Review page will remind you what's still missing before you can submit. The Polaris API page is the one exception: use the Skip button there instead of leaving it blank.
- Message looks like it's over the limit? The counter includes the expanded length of any variables (like a patron's name or item title), not just the characters you typed.
- Still stuck? Contact your CGS representative, or email support@cgsis.com.